🚀Quickstart
Your first ten minutes in Shippified, following the setup wizard from your first webhook bot to your first order.
- Written for
- New Shippified users with an empty workspace
- Applies to
- All plans
- Deprecated
- + Deprecated
This guide walks you through the setup wizard that opens the first time you sign in to Shippified. In about ten minutes you'll create a private webhook URL for a Discord monitor, optionally connect an email inbox, add your first order, and land in your workspace with everything ready. Every step can be skipped and done later from the Links page.

Before you start
Create your account first. See Create an account and sign in.
Have one source in mind. Either a Discord monitor or bot whose webhook URL you can change, or the email account that receives your retailer order confirmations. You only need one to get going.
Keep the monitor's settings open in another window if you plan to use a Discord monitor, so you can paste the URL straight in.
When the wizard appears
Shippified opens the wizard (titled Shippified onboarding) automatically when you sign in and your workspace is completely empty: no webhook bots, no inboxes and no orders. Once you finish or skip it, it doesn't open again in that browser.
Across the top, a progress bar shows the four stages: Webhook bot, Inbox, First order and Done. The current stage is highlighted, and finished stages show a check mark. The progress bar is for information only; use the buttons at the bottom of each step to move around.
You can reopen the wizard at any time by going to shippified.net/onboarding/1 while signed in. If you already have a bot or an inbox, the wizard shows it as already created and lets you continue.
Step 1: Create a webhook bot
A webhook bot is a private URL for one Discord monitor. A webhook is a URL that a bot posts each checkout to. When your monitor posts a successful checkout to this URL, Shippified reads it and adds the order to your workspace. The step's heading is Wire up your first Discord webhook.
- Name the bot
In Display name, enter a name you'll recognise, such as the monitor's name and the store it watches (for example
Hayha — Target). This name labels the bot's orders everywhere in Shippified. It starts out filled in asTarget Monitor; replace it with your own. - Choose the webhook slug
Webhook slug is the last part of the URL, for example
hayha-target. It can only contain lowercase letters, numbers and hyphens: as you type, capitals become lowercase and any other character (including spaces) becomes a hyphen. Leading and trailing hyphens are removed when the bot is saved. If another of your bots already uses the slug, Shippified adds a number to the end (hayha-target-2). After you create the bot, the field and the URL show the slug exactly as it was saved. - Leave the template on auto-detect
Parser template decides how Shippified reads this bot's messages. Leave it on Auto-detect (recommended) and Shippified picks the right template for each message. Only choose a specific template from the list if you know exactly which one matches your monitor: a chosen template is used for every message from this bot, even ones it doesn't fit.

- Create the bot
Click Create bot. The button reads Creating… for a moment, then a panel appears saying Your bot's intake is live. with your webhook URL underneath. The URL looks like
https://shippified.net/api/webhooks/discord/<your-id>/<slug>. If the bot can't be created, the reason appears above the buttons instead; fix it and click Create bot again.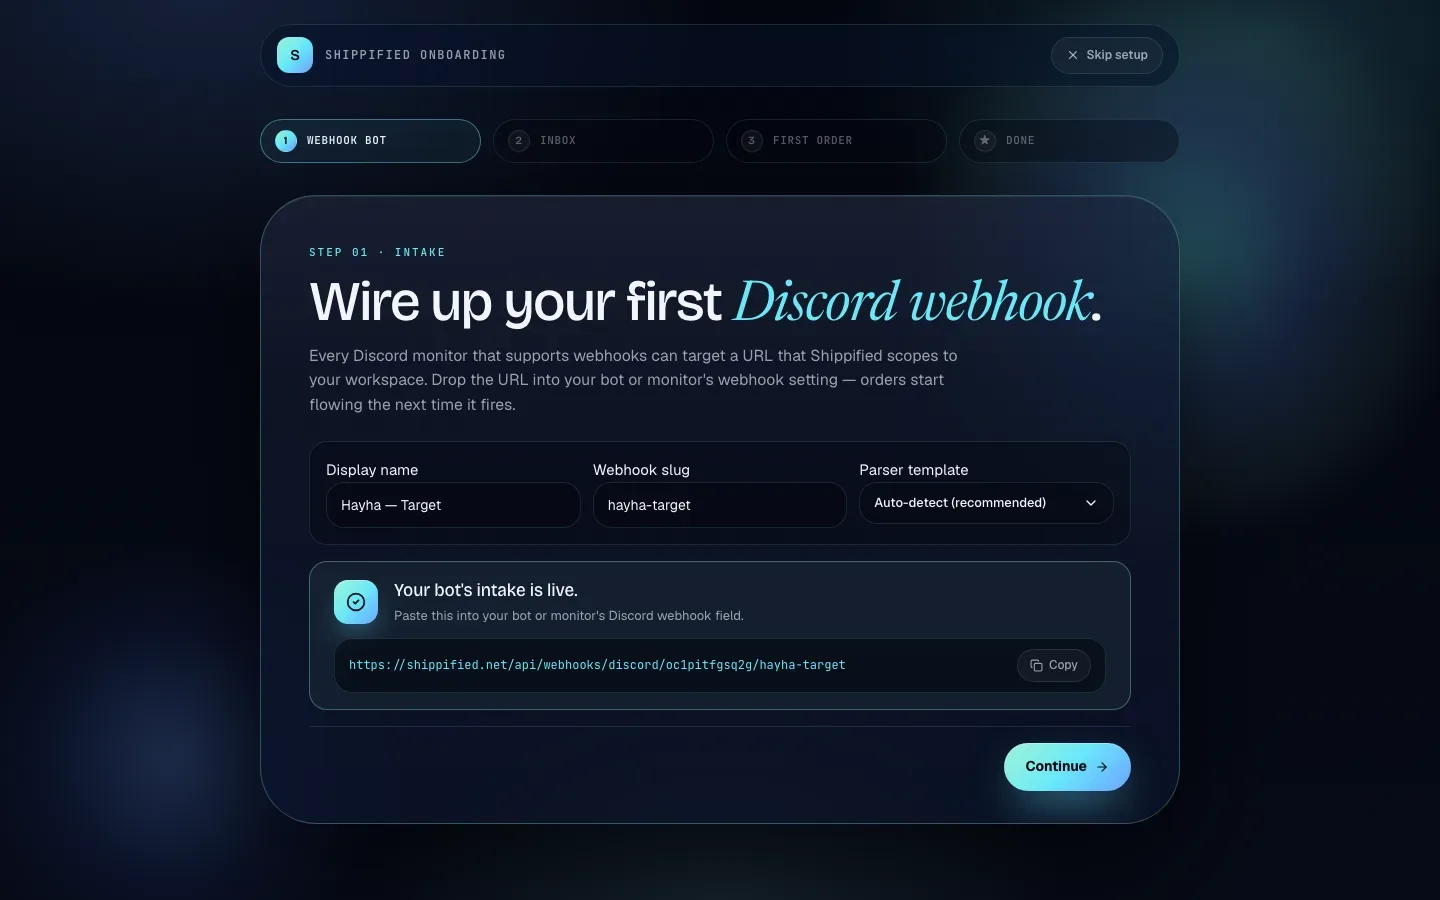
- Copy the URL into your monitor
Click Copy, then paste the URL into your monitor's Discord webhook field (where you'd normally paste a Discord channel webhook). Save the monitor's settings.
- Continue
Click Continue to move to the inbox step.
Your webhook URL works like a password. Anyone who has it can post orders into your workspace. Don't paste it in public channels or screenshots. If it leaks, delete the bot on Links → Webhooks and create a new one with a different slug.
Don't use Discord monitors? Click No Discord bot — email only at the bottom of step 1 to go straight to the inbox step without creating a bot. (Skip setup at the top closes the whole wizard instead.)
Step 2: Connect an inbox (optional)
This step's heading is Connect a retail inbox. If you also receive order confirmations, shipping notices and delivery notices by email, connecting that inbox lets those emails create and update your orders. The form, titled Connect an inbox, is the same one used on Links → Email.

- Give the inbox a label
Label is a name for this inbox inside Shippified, such as
Order Inbox(the default). It appears on orders and on the Inbox page. - Enter the address
Address is the email address you're connecting, such as
orders@yourdomain.com. For a forwarding address, you can leave it blank, because Shippified creates the address for you. - Pick a provider
Open the Provider list and choose how Shippified should read the mail. Each option is explained in the table below.

- Fill in the provider's details
IMAP (any provider): enter IMAP host (for Gmail,
imap.gmail.com), Port (usually993), leave TLS on Enabled, and enter your Username and Password / app password. If Username is blank, the Address is used. Use an app password, not your regular password: for Gmail and Google Workspace, turn on 2-Step Verification and create an App Password (or pick Google (OAuth) instead); Yahoo, iCloud and most others let you generate one in the account's security settings. Outlook, Hotmail and Microsoft 365 no longer accept passwords over IMAP, so choose Microsoft (OAuth) for those.Google (OAuth) or Microsoft (OAuth): nothing else to fill in yet. The Connect Google account / Connect Microsoft account button in the form only works after the inbox is saved; you'll sign in right after saving (see the next steps).
Forwarding address: nothing else to fill in. When you save, Shippified creates a unique address ending in
@shippified.netfor you to forward retailer mail to.

- Leave templates and senders empty for now
Templates this source parses against lists the built-in retailer templates (and any custom email templates you have). With none selected it says None selected — your custom templates are tried first, then every built-in, which is what you want for a first run. If you click some, only those are tried. You can change this later from Links → Email.
Allowed senders limits which senders' mail is read. Leave it empty to accept any sender. If you do fill it in, put one entry per line: an exact address (
orders@target.com), a domain wildcard (*@target.com) or a bare domain (target.com). - Save the inbox
Click Connect inbox. When it's saved, the form is replaced by Inbox connected. and the note "You can scope it to specific retailers later in Links → Email." Click Continue.
- Google or Microsoft: sign in
If you chose Google (OAuth) or Microsoft (OAuth), the panel reads Inbox saved — one more step. instead, with a Connect Google account (or Connect Microsoft account) button. Click it and approve access in the new tab that opens. The wizard notes "Finish signing in in the new tab. The inbox starts syncing once you're connected." Then click Continue. If your browser blocks the new tab, you'll see "Your browser blocked the sign-in window. Allow pop-ups for this site and try again."

Until an inbox is saved, the main button reads Save the inbox above to continue and can't be clicked. To move on without an inbox, click Skip — Discord only.
Provider | Choose it when | Ready after saving? |
|---|---|---|
IMAP (any provider) | Your mail provider supports IMAP and you can use a password or app password. | Yes. Shippified can start reading mail straight away. |
Google (OAuth) | Your orders go to Gmail or Google Workspace and you'd rather approve access in Google than use an app password. | After you click Connect Google account on the Inbox saved — one more step. panel (or later on Links → Email) and approve access. |
Microsoft (OAuth) | Your orders go to Outlook, Hotmail or Microsoft 365. | After you click Connect Microsoft account and approve access, the same way. |
Forwarding address | You'd rather not give Shippified access to your mailbox, and are happy to set up a forwarding rule instead. | Yes, once you forward mail to the new address. The address is shown on the inbox's card on Links → Email. |
For every provider in detail, see Connect an email inbox.
Step 3: Add your first order
The last step, Add your first order., lets you watch Shippified read a message and add it to your workspace as a real order. There are two cards; each one is only available if you set up the matching source.
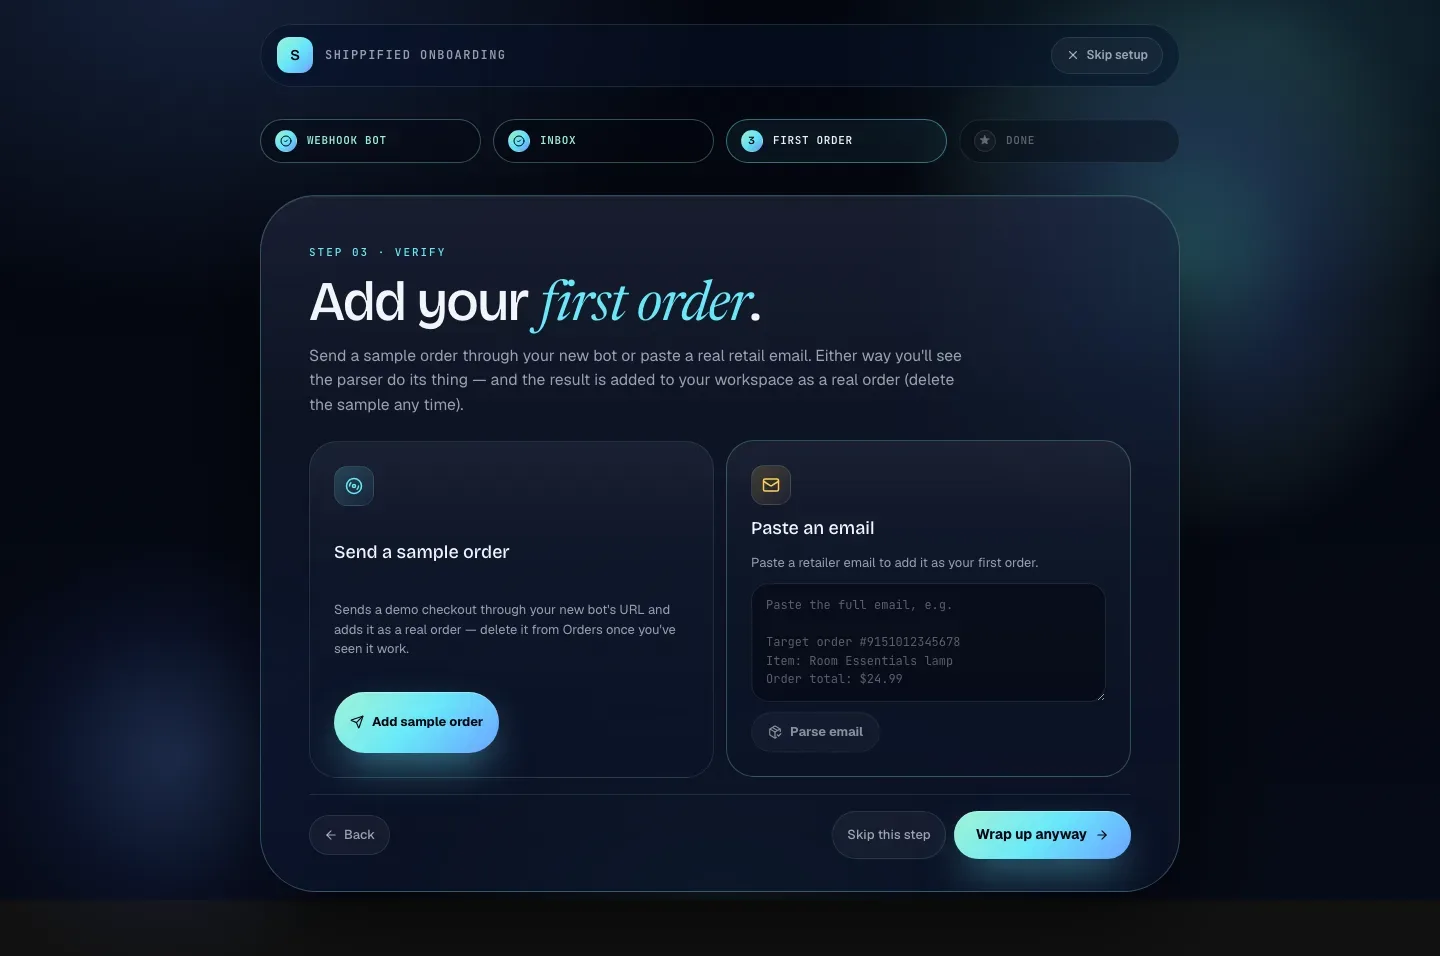
- Send a sample order
- Paste an email
Available if you created a bot in step 1. Otherwise the card says "Create a bot in step 1 to unlock this."
- Send the sample
Click Add sample order. Shippified posts a demo Target checkout (a Nike Dunk Low Panda with a UPS tracking number) to your bot's URL, exactly as your monitor would, and adds it as a real order.
- Check the result
A message appears under the cards, followed by the number of orders now in your workspace. The table below says what each message means.
Message | What it means |
|---|---|
Parsed — new order added | It worked: the sample became a new order. |
Parsed — merged into an existing order | It worked, and updated an order you already had (for example, you sent the sample twice). |
Received, but no order could be parsed from it. … | The URL works, but no order was made from the message. |
Received, but not added (plan limit reached) | The Free plan's monthly limit is used up (see Troubleshooting). |
An error such as Unknown webhook URL | The URL rejected the post (see Troubleshooting). |
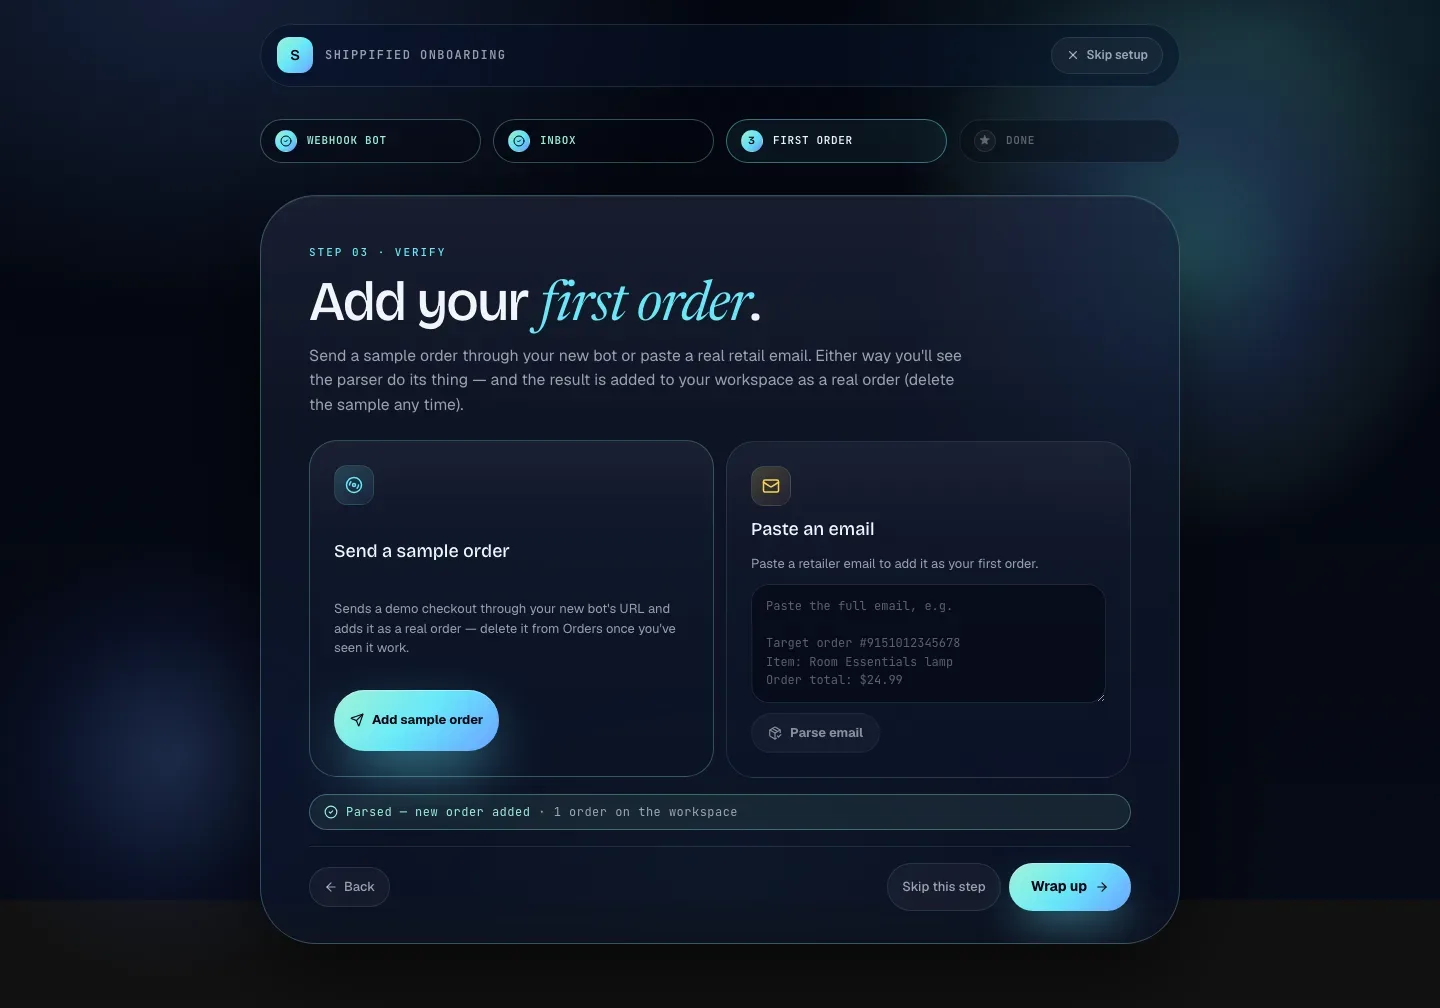
Available if you saved an inbox in step 2. Otherwise the card says "Connect an inbox in step 2 to unlock this."
- Paste an email
The box starts empty, with a short example in grey. Paste a real order email from a retailer into it. The full raw email (with its headers) gives the best result.
- Parse it
Click Parse email (it can't be clicked while the box is empty). Shippified imports the text through your new inbox, the same way as Import an email by hand on Links → Email. Email parsed and added means it worked. Otherwise the error is shown in the same place.
The sample order and any pasted email are real orders in your workspace. (Paid plans are switched off on shippified.net, so there's no monthly order limit for them to count against.) The sample always uses the same order number, so sending it again merges into the same order instead of adding another. To remove the sample later, open it on Orders and click Delete order in its detail panel.
When you're done, click Wrap up. If you didn't add an order, the button reads Wrap up anyway. Skip this step does the same thing: it takes you to the finish screen.
Finish: your workspace is live
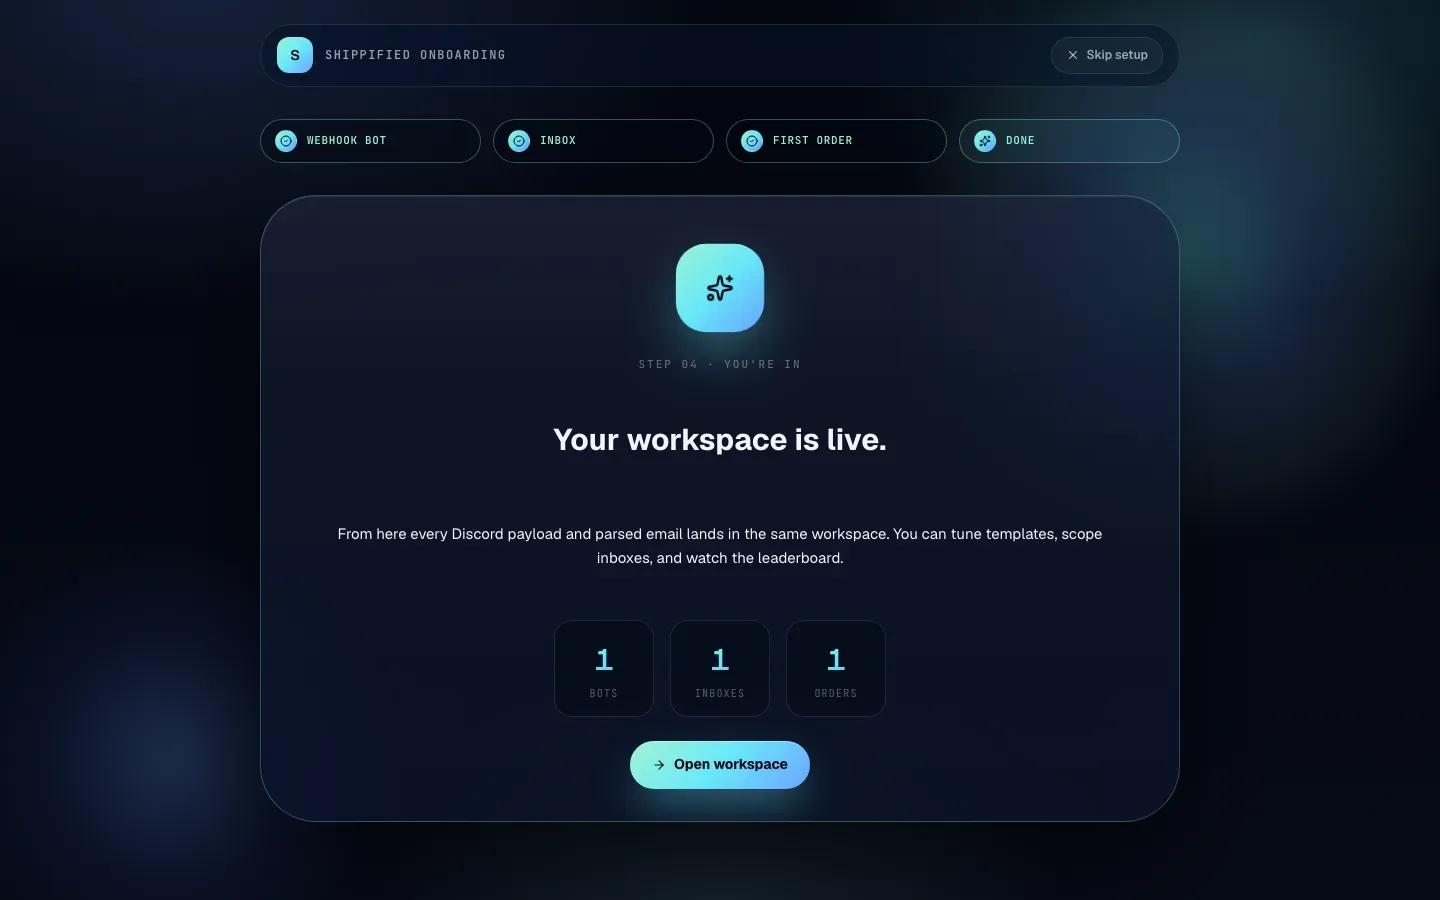
The finish screen, Your workspace is live., counts what you set up: Bots, Inboxes and Orders. Click Open workspace to go to your dashboard.
Going back and skipping
Button | Where | What it does |
|---|---|---|
Skip setup | Top right of every screen | Closes the wizard and opens your dashboard. Anything you already created is kept. |
No Discord bot — email only | Step 1, before a bot is created | Moves to step 2 without creating a bot. |
Back | Bottom left of steps 2 and 3 | Returns to the previous step. What you created stays created: going back to step 1 shows your existing bot and its URL. |
Skip — Discord only | Step 2 | Moves to step 3 without connecting an inbox. |
Skip this step | Step 3 | Moves to the finish screen without adding an order. |
Continue | Steps 1 and 2 | Appears once the bot or inbox is created. Moves to the next step. |
Once you skip or finish the wizard, it won't open by itself again in that browser. Everything it does can also be done from the Links page.
What to do next
Finish connecting Google or Microsoft if you chose one in step 2 and didn't sign in there. Open Links → Email; the inbox's card says "Not connected yet — sign in to Google before this inbox can sync." (or Microsoft). Click Connect Google (or Connect Microsoft) on the card and approve access in the new tab. See Connect an email inbox.
Set up forwarding if you chose a forwarding address. Copy the address from the inbox's card on Links → Email and create a forwarding rule in your mail provider.
Wait for a real checkout. The next time your monitor posts, the order appears on Orders. To check the URL without waiting, click Send test payload on the bot's card on Links → Webhooks. That's a dry run: it shows what Shippified read but adds nothing.
Add more monitors. Give each monitor its own bot on Links → Webhooks so each keeps its own stats. See Connect Discord monitor bots.
Pull in older orders. Once an inbox is connected, Rebuild orders from mailbox on its card reads past mail. See Rebuild from mailbox.
Look around. The dashboard tour explains every screen in the sidebar.
Troubleshooting
I clicked Create bot and got an error
The reason is shown above the buttons. If it says you're not signed in or the request failed, reload the page and sign in again; if your bot was created after all, step 1 shows its URL. Otherwise fix what the message says and click Create bot again.
"Unknown webhook URL" or "Webhook ingest rate exceeded"
"Unknown webhook URL" or "Unknown bot webhook route for this user" means the bot's URL wasn't found, for example because the bot was deleted. "Webhook ingest rate exceeded for this bot (60/min)" means too many posts were sent to it in the last minute; wait a minute and try again.
The inbox won't save
The error appears above Templates this source parses against. For IMAP, "imapConfig.password is required to connect an IMAP source." means the Password / app password field is empty, and "imapConfig.host is required." means IMAP host is empty. Fill them in and click Connect inbox again.
"Save the source first, then click Connect Google on the saved card."
You clicked Connect Google account (or Connect Microsoft account) inside the form before the inbox was saved. Click Connect inbox first, then use the Connect Google account button on the Inbox saved — one more step. panel.
Parse email says "Couldn't read that email."
Shippified didn't recognise the pasted text as an order from a retailer it knows. Try pasting the full raw email, including its headers. If the retailer isn't supported, you can build a template for it. See Custom templates.
Parse email says a sender "is not in this source's allowed senders."
You filled in Allowed senders and the pasted email came from someone else. Add that sender to the list from Links → Email, or clear the list.
"Free plan limit reached"
Only possible if paid plans are switched on (they're off on shippified.net today): your workspace has already added 100 new orders this month on the Free plan. New orders are paused until the counter resets on the 1st. See Plans and billing.
The wizard didn't open when I signed in
It only opens for a completely empty workspace, and only if it hasn't been finished or skipped before in that browser. Go to shippified.net/onboarding/1 to open it yourself, or set things up from Links.